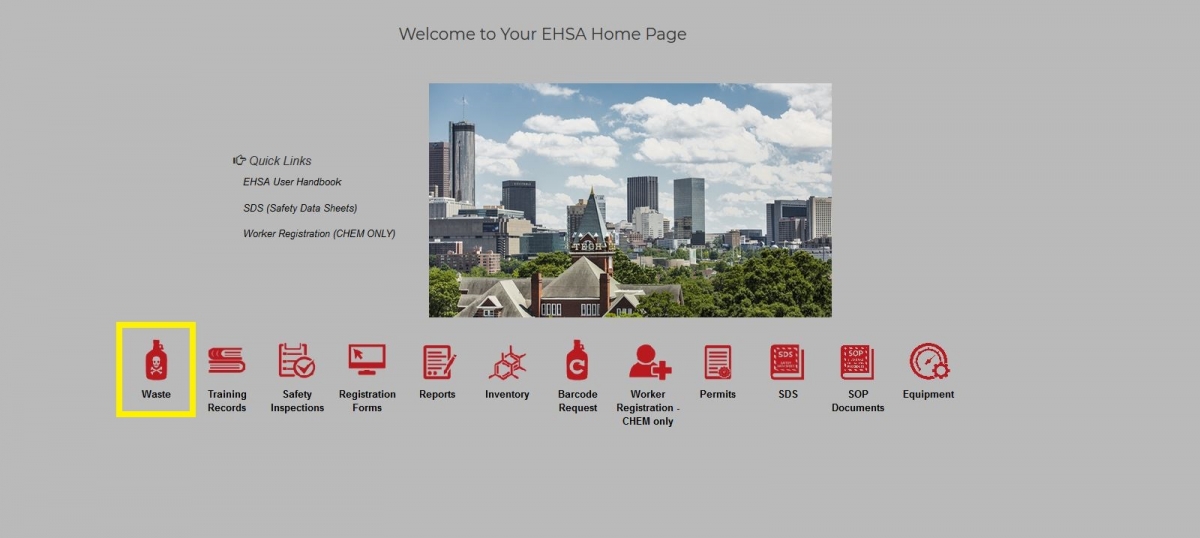
Creating a Waste Label
- Click on “Waste” icon
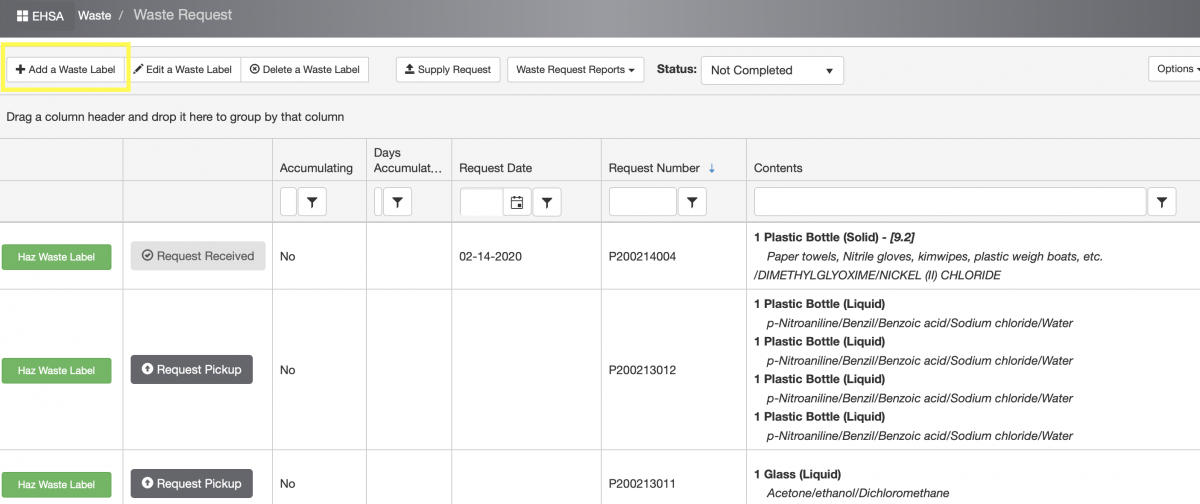
- Click on "+Add a Waste Label" icon (left top corner), a new screen will pop out
- Fill out the form to the best of your knowledge. Do not guess - if you are not sure, leave an empty field. All red marked fields must be filled out. Feel free to post comments in a "Comments" field. Double check your PI and lab room info.
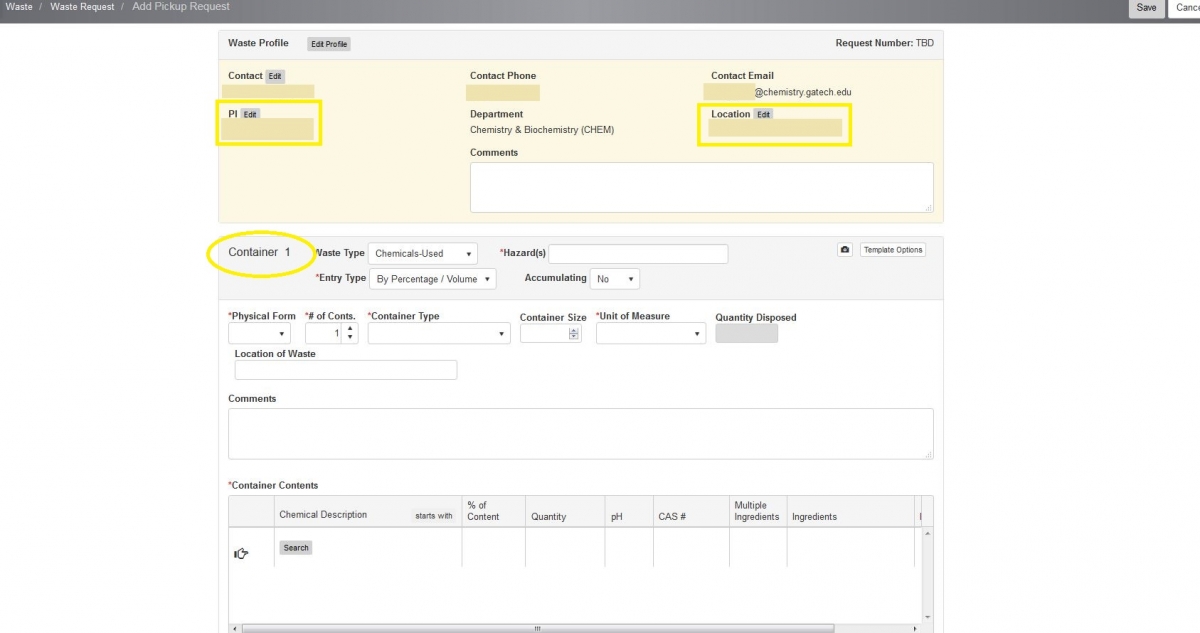
- If you have more than one container, click "Add Container".
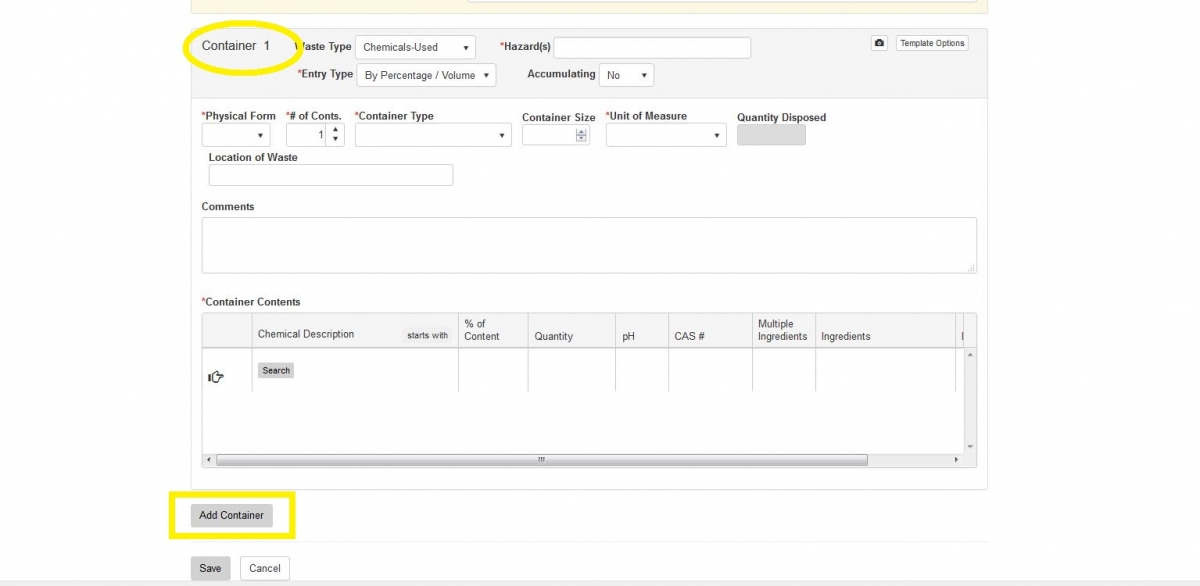
- Click on "Save" at the bottom of a page.
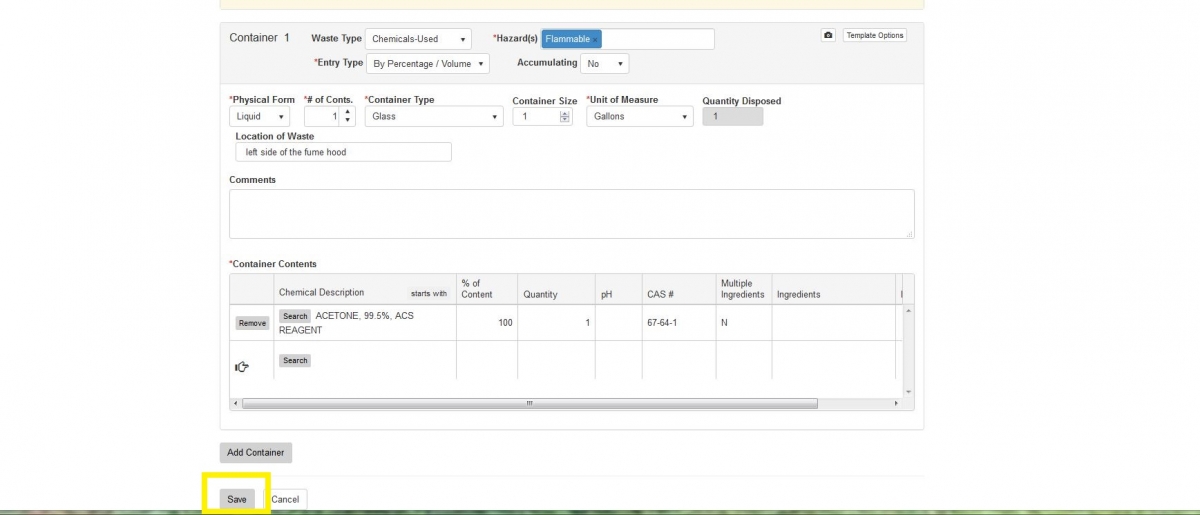
- Print your new waste label immediately and apply on your waste container. To print - go to "Haz Waste Label" green icon (first left column), a new tab or window (depending on your browser preferences) will show up. Print it and apply on your waste container immediately.
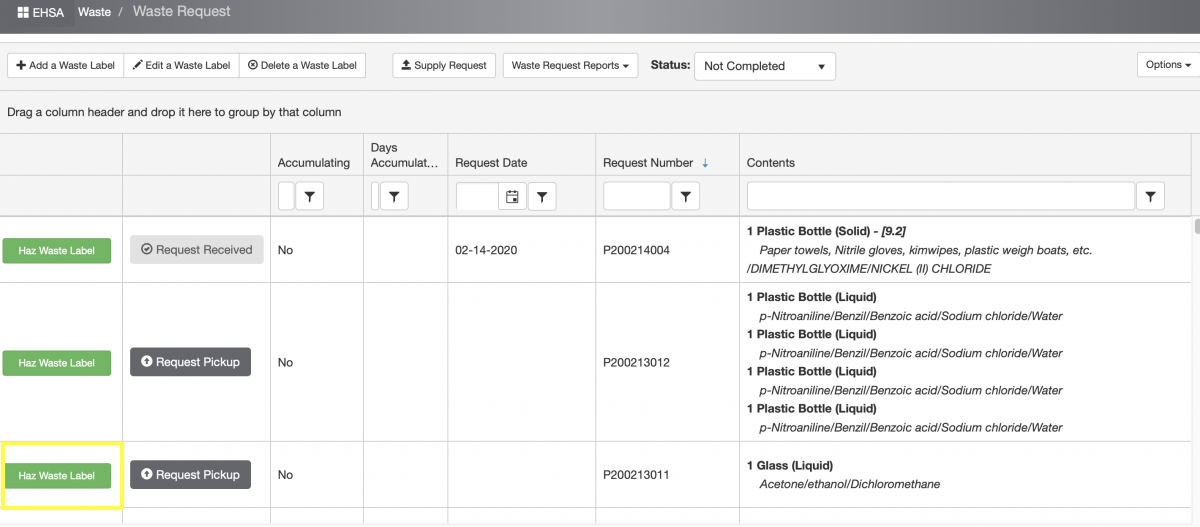
Updating a Waste Label
- Click on “Waste” icon
- Highlight a Waste Container you are interested in by a single mouse click

- Click on "Edit a Waste Request" icon (left top corner, second left icon), a new screen will pop out.

- Update your current waste label.

- Click "Save" when you finish updating the label.

- Print the updated waste label and apply on a waste container immediately.